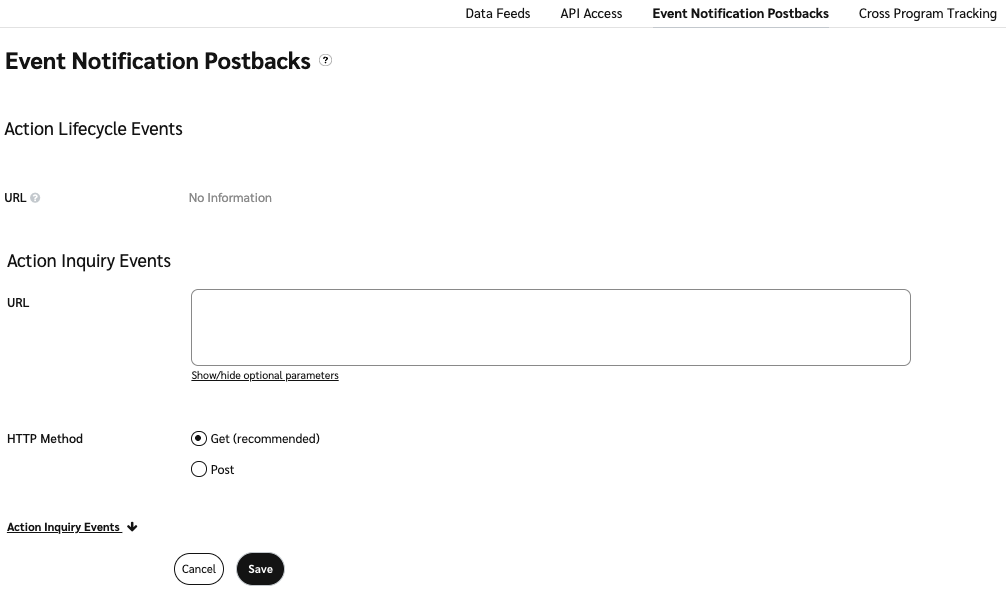
If you want to receive real-time notifications whenever action inquiries are created or resolved, you can set up event notifications. For more information on what event notifications are and how action inquiry postbacks work, and more, see Action Inquiry Event Notification Postbacks FAQ for Partners.
Set up action inquiry postbacks
Action inquiry postbacks update you whenever an action inquiry is opened or closed by an impact.com account user in your account. To set up action inquiry postbacks:
From the top navigation bar, select
[User profile] → Settings.
Under Technical, on the left, select Event Notifications.
Hover over the Action Inquiry Events field and select
[Edit].
Enter your server's URL. This is the URL to which impact.com will send postbacks.
Select your preferred HTTP method.
If you select Post, you will need to enter the body of the request. Below is an example of how you might want to map each data point for a JSON format. The keys in each key-value pair should be sourced from your own system’s setup, and the values will be your chosen coinciding data point that impact.com provides and should be entered in curly brackets
{ }.
View some of impact.com's available body parameters.
Don't see a value you need? Reach out to your Publisher Account Manager (or contact support).
Select the Body Format that matches your setup in Step 5.
Select Action Inquiry Events
These settings are optional.
Enter an HTTP Header as a way to pass additional information between you and the server.
Enter a Minimum Delay between when an event happens and when the postback is generated and sent to your system.
Enter a rate limit for the Maximum Requests impact.com can make to your system per second.
Enter what you want the Success Response to a postback to be.
Enter what you want the Error Response to a postback to be.
Select Save.
Now that you have action inquiry postbacks set up, your system should begin receiving postbacks whenever an inquiry is created by your account or resolved by a partnered brand. To learn how to test your new postback setup, view the Test an action inquiry postback section below.
Once you set up action inquiry postbacks, you should test your setup. Make sure you notify your partnered brand that you'll be testing your postback setup.
From the top navigation menu, select Content → Assets.
Select an asset, then in the slide-out, select Get Tracking Link. Ensure that there are values in the Sub ID and Shared ID fields:
[Toggle on] Tracking Parameters, enter at least one word in each Sub ID and Shared ID field, then select Save.
Select Copy Tracking Link.
Paste the link into a fresh browser window and search.
Complete the action.
This action will ultimately be reversed.
After about 15 minutes, find the action on the Pending Actions screen. You'll need some pieces of information to generate an action inquiry in-app:
The brand associated with your test action.
The action's Order ID.
The action's Sale Amount.
The action's Transaction Date.
Create a new action inquiry in impact.com. In the Notes section, mention this is a test inquiry.
Learn how to create an inquiry via the UI.
After doing so, you should receive a postback letting you know an action inquiry was created. If you see the new inquiry on the Inquiries screen but have not received a postback yet, double-check your postback setup.
Provide your partnered brand with the Order ID associated with the inquiry and ask them to Decline the inquiry.
When the brand declines the inquiry, you should receive another postback informing you of the inquiry's resolution. If you see the inquiry update on the Inquiries screen but have not received a postback yet, double-check your postback setup.
Warning: If you cannot find any issues with your postback setup but are still not receiving postbacks, contact support. We can check if postbacks are being generated, what the response code for them is, as well as the body for each postback. This information might help you successfully debug your setup.
![[Legacy tooltip]](https://paligoapp-cdn-eu1.s3.eu-west-1.amazonaws.com/impact/attachments/f01cdffa431a4d75ff09c130b66974d4-4887b2bb2e3a3c247d937c7ed256303e.svg)