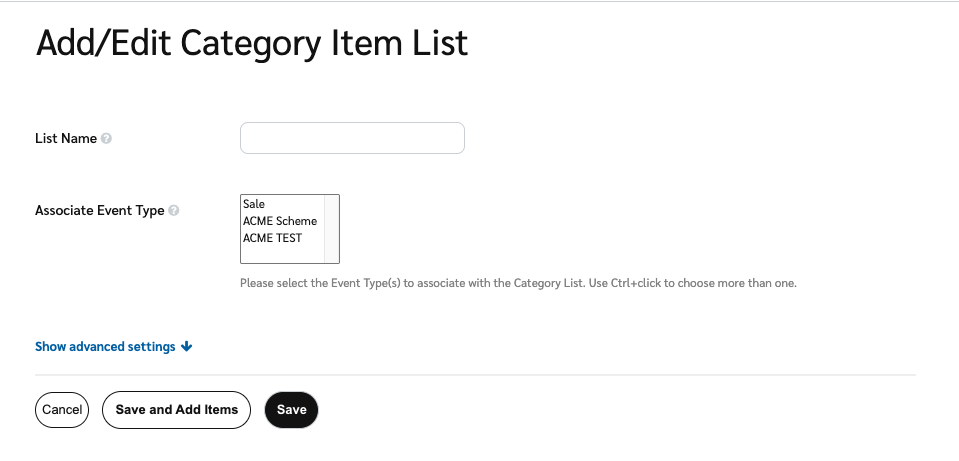
Category exception lists (and SKU exception lists) can be used to pay partners different rates based on the category or the SKU associated with the action they drove.
When would I use this feature?
Lead Gen: Category-based payouts may be implemented for lead generation campaigns that wish to vary payouts according to demographics. For example, your business may have a higher lead conversion rate for customers from the United States as compared to other countries. You could then decide to assign a higher category payout to leads for customers in the US.
Sales: Let's say Product A has a larger profit margin than Product B, and you want to reward partners that drive actions for Product A. You could use an SKU-based exception list to detect for actions that include Product A and increase your payout.
The above are just a couple of the common use cases—there are a range of other ways this feature can be used as well.
Create a category exception list
From the top navigation bar, select
[User profile] → Settings.
In the Program column, scroll to Exception Lists and select Category.
In the upper right corner, select Add New Category List.
Fill out the following information:
List Name
Add a name for this list—this will only appear internally to you and other account members; partners will not see it.
Associate Event Type
Select the event type(s) you want to associate with this exception list.
Match Expression
[Advanced & Optional] Enables the system to match a part of the category value via specifying a regular expression with ONE grouping. The value represented by the grouping will be matched against the SKU value in this list. If you have a use case for regex but are unsure how to configure it, contact support.
Select Save and Add Items to continue.
You can add Categories and optional Display Values using the fields in the UI, or you can Upload a CSV or Excel file with your categories.
Once you've added items or uploaded a file, select Save to complete the process. You'll now see your new category exception list on the Category Lists screen.

Create a .CSV or .XLS/.XLSX file using the two column names below.
Column | Type | Required | Description |
|---|---|---|---|
Category | String | Yes | The value that is included in tracking conversion data. |
Display Value | String | No | Enter a display value if you want to show a different value in reporting. For example, if the Category value is some sort of computer generated value, then you might want to enter a display value to make it easier to understand in reporting. |
For example:
Category, Display Value
NEW PRODUCTS, Latest Releases
Typically payout rates are based on item categories; however, you can also set a payout rate for a specific item. You would need to create an item category for each item you want to have a specific payout. When you create template terms, you'll need to specify payout rates for each category list. All category names associated with a category list will have the same payout rate per the contract.
Create a SKU exception list
From the top navigation bar, select
[User profile] → Settings.
In the Program column, scroll to Exception Lists and select SKU.
In the upper right corner, select Add New SKU List.
Fill out the following information:
List Name
Add a name for this list—this will only appear internally to you and other account members; partners will not see it.
Associate Event Type
Select the event type(s) you want to associate with this exception list.
Match Expression
[Advanced & Optional] Enables the system to match only on a part of the SKU value via specifying a regular expression with ONE grouping. The value represented by the grouping will be matched against the SKU value in this list. If you have a use case for regex but are unsure how to configure it, contact support.
Select Save and Add Items to continue.
You can add a SKU and optional Display Values using the fields in the UI, or you can Upload a CSV or Excel file with your SKUs.
Once you've added items or uploaded a file, select Save to complete the process. You'll now see your new category exception list on the SKU Lists screen.
Create a .CSV or .XLS/.XLSX file using the column names below.
For example:
SKU, Display Value, Active Start Date, Active End Date
12345ABC, Acme Bird Seed, 2038-01-19T12:00-07:00, 2038-01-20T23:00-07:00